This post is about hardware and software internals of a popular IP Camera from Shenzen company Foscam.
1. Hardware
Foscam C1 was launched to market in 2015. I had chance to buy one from the local store before it get replaced by C2 and C2M.

1.1 Specifications
- ARM9 HI3518E (V300) from Hitec
- 16 MiB flash memory
- 64 MiB RAM memory
- (put chip here) as 720p image sensor
- PIR sensor for a more accurate move sensing
- Speaker and microphone
- Ethernet and 2.4 ghz WiFi
- 110 grades of view len
- Night vision
1.2 Serial port access
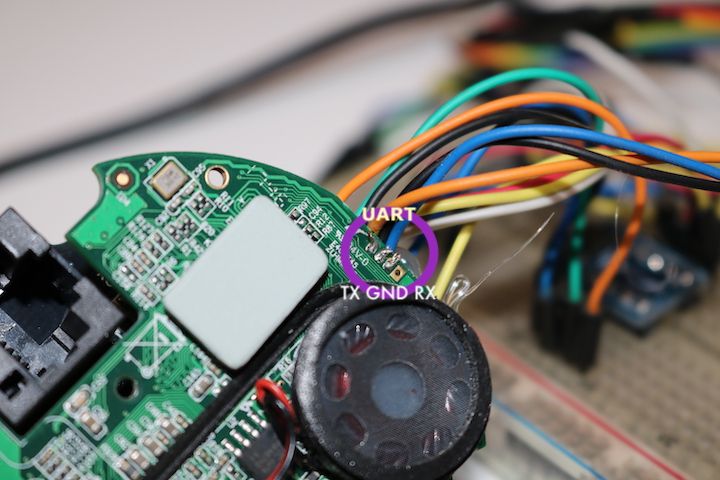
An UART serial port is available next to the speaker as show the image below.
The bootloader configures this port at 115200 bauds with 8 data bits, no parity bit and one stop bit (8N1).
1.3 Flash memory
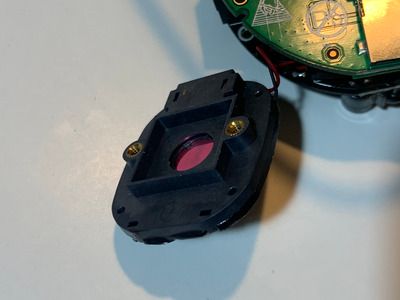
The flash memory is under the IR filter, so you need to remove it first.
In my first attempt I plugged mini grabber test clips to pins but I didn't get any response from the chip. In my naive second attempt I used a 4 dollar iron heat pencil and a little pressure to take the pins off from the board but it was the worst idea I ever had.
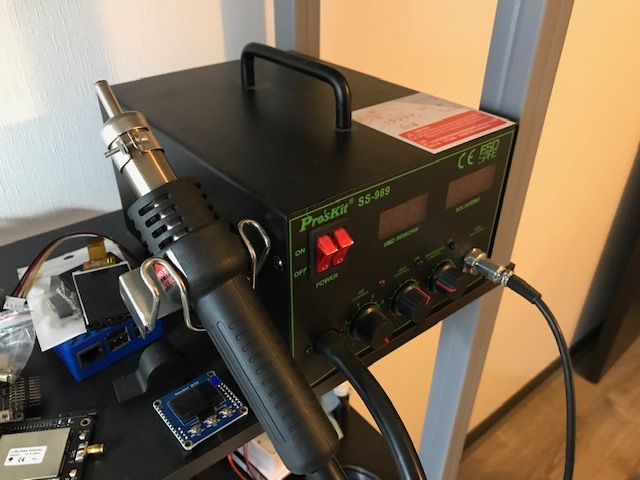
In my third and last attempt I took this seriously.

I covered the components around the target and I applied 500 celsius degrees over it. Just a tweezer was needed to extract the chip.
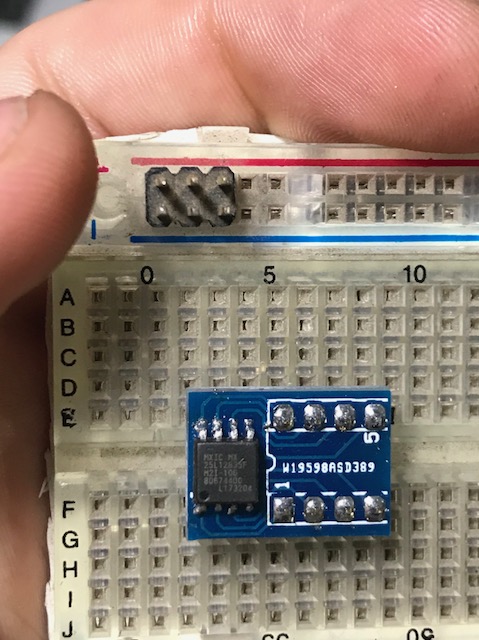
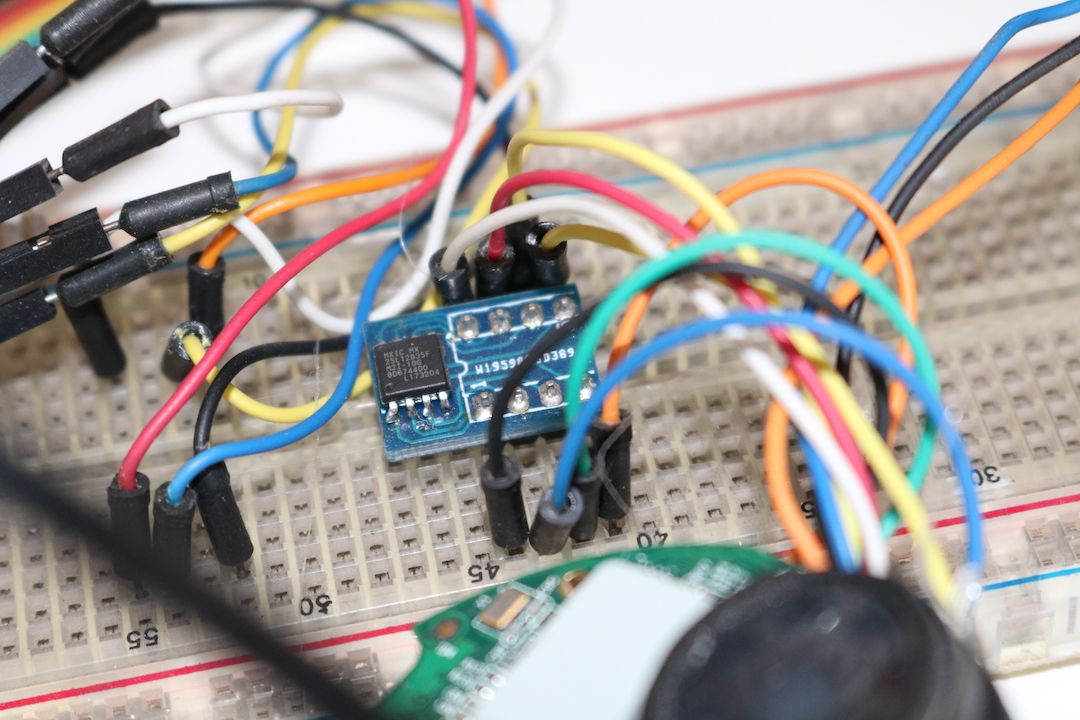
Next, I soldered it on a SOIC8 to DIP8 adapter board to make easier interfacing to another chip. Also, I wired the camera board pads to reconnect the flash memory again if I want to.
The firmware is stored in the flash chip with no obfuscation nor encryption. The expected flash layout is:
- An initialization and bootstrapping program
- An OS kernel
- A root filesystem
- Another partitions
Let's take a look inside.
1.3.1 Dumping flash memory
The chip (MX25L12835F) is communicated through an SPI bus. I found a lot of Arduino libraries for dealing with SPI but I chose a project totally devoted to this subject: Flashrom. Basically, if you have a Linux's spidev compatible controller, flashrom will recognize it. An extensive list of Flashrom's supported hardware is available here.
RESET and WP# pins are not required to be plugged for successful communication. RESET has an internal pull-up and it is activated when has a low state. WP# (write protection) should be connected to GND only if you want to erase/write the flash memory.
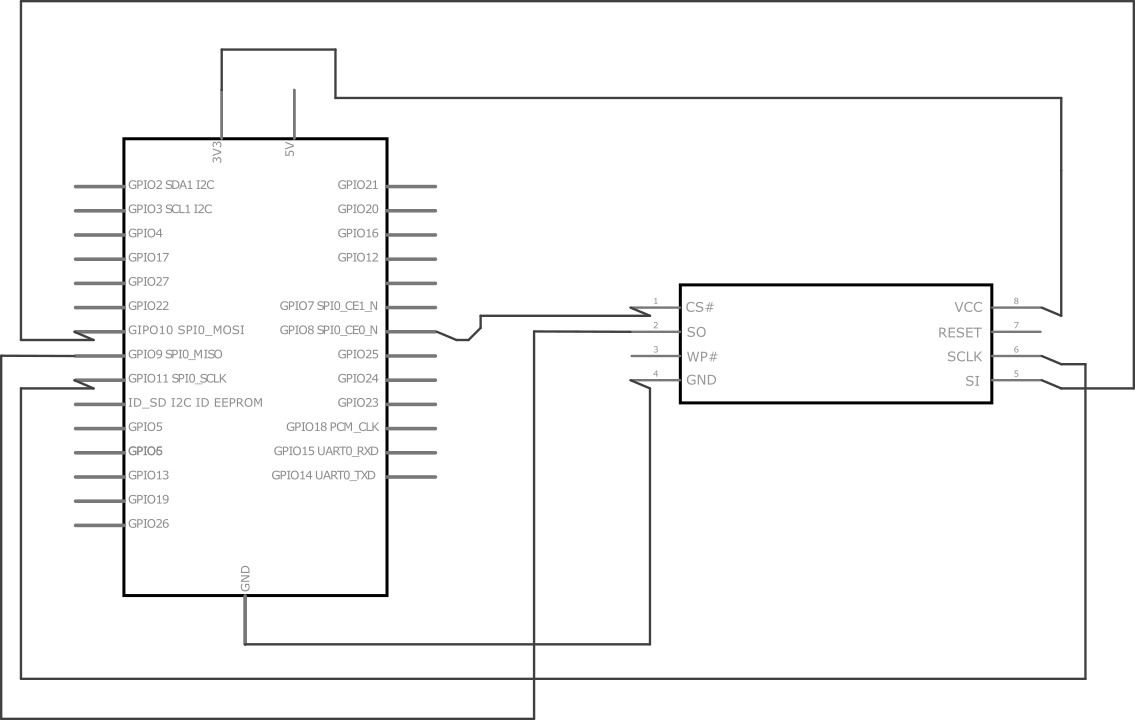
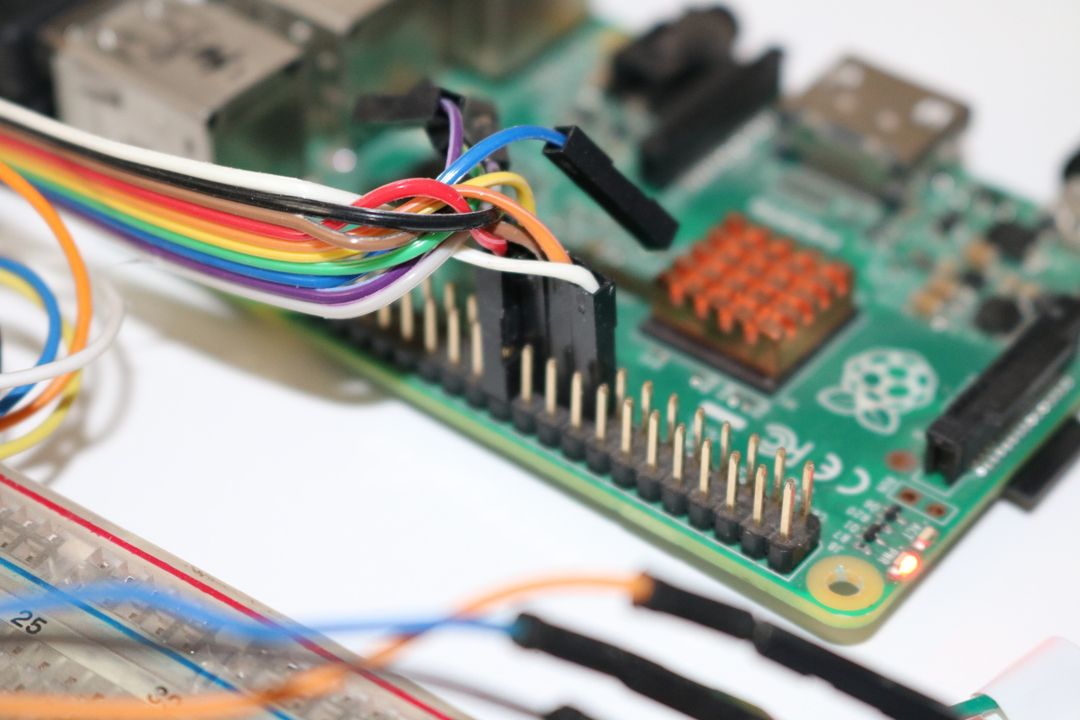
Once the chip is connected to Raspberry Pi SPI controller, run the command as follows:
$ flashrom -c "MX25L12835F/MX25L12845E/MX25L12865E" -p linux_spi:dev=/dev/spidev0.0 -r flash_dump
Note: flashrom -l prints a list of supported chips
If it takes too long, check the wires. My flash dump can be found here
2. Software
2.1 Boot
The next boot log was gotten from the serial console:
System startup


U-Boot 2010.06 (Nov 16 2017 - 11:43:05)

Check Flash Memory Controller v100 ... Found
SPI Nor(cs 0) ID: 0xc2 0x20 0x18
##uboot 020sdk patch!##
Block:64KB Chip:16MB Name:"MX25L128XX"
SPI Nor total size: 16MB
MMC:
EMMC/MMC/SD controller initialization.
Card did not respond to voltage select!
No EMMC/MMC/SD device found !
*** Warning - bad CRC, using default environment

In:    serial
Out:   serial
Err:   serial
Hisilicon ETH net controler
init rmii phy led completed
Hit any key to stop autoboot:  0
16384 KiB hi_fmc at 0:0 is now current device

## Booting kernel from Legacy Image at 82000000 ...
   Image Name:   Linux-3.4.35
   Image Type:   ARM Linux Kernel Image (uncompressed)
   Data Size:    2976536 Bytes = 2.8 MiB
   Load Address: 80008000
   Entry Point:  80008000
   Loading Kernel Image ... OK
OK

Starting kernel ...

Uncompressing Linux... done, booting the kernel.
Booting Linux on physical CPU 0
Linux version 3.4.35 (jllee@ubuntu) (gcc version 4.8.3 20131202 (prerelease) (Hisilicon_v300) ) #3 Tue Nov 7 10:41:02 CST 2017
CPU: ARM926EJ-S [41069265] revision 5 (ARMv5TEJ), cr=00053177
CPU: VIVT data cache, VIVT instruction cache
Machine: hi3518ev200
...
The full boot log can be found here
2.2 Partitions
$ rizin flash_dump
[0x00031abe]> /i bootargs
Searching 8 bytes in [0x0-0x1000000]
hits: 2
0x00027e5c hit12_0 .ess %08lx) ...bootargs## Transferring.
0x00031a78 hit12_1 .\bootargs=mem=44M console.
[0x00031abe]> 0x00031a78
[0x00031a78]> ps
bootargs=mem=44M console=ttyAMA0,115200 mtdparts=hi_sfc:512K(boot),3M(kernel),11M(app),1M(app_ext),512K(para)
[0x00031a78]>
bootargs gives a clue about partitions sizes and names:
| Offset on flash | Name | Size (KiB) |
| 0x000000 | Boot (mtd0) | 512 |
| 0x080000 | Kernel (mtd1) | 3072 |
| 0x080c00 | App (mtd2) | 11264 |
| 0x083800 | App Ext (mtd3) | 1024 |
| 0x083c00 | Parameters (mtd4) | 512 |
With the partitions layout above I can split the flash dump to make easier the exploration. In the following commands be aware bs (block size) argument is in bytes and, skip and count arguments are in blocks.
$ dd if=flash_dump of=mtd0 skip=0 bs=512 count=1024
1024+0 records in
1024+0 records out
524288 bytes (524 kB, 512 KiB) copied, 0,00643465 s, 81,5 MB/s
$ dd if=flash_dump of=mtd1 skip=1024 bs=512 count=6144
6144+0 records in
6144+0 records out
3145728 bytes (3,1 MB, 3,0 MiB) copied, 0,0188701 s, 167 MB/s
Do you see? I'm accumulating count to calculate skip
$ dd if=flash_dump of=mtd2 skip=7168 bs=512 count=22528
22528+0 records in
22528+0 records out
11534336 bytes (12 MB, 11 MiB) copied, 0,0594871 s, 194 MB/s
$ dd if=flash_dump of=mtd3 skip=29696 bs=512 count=2048
2048+0 records in
2048+0 records out
1048576 bytes (1,0 MB, 1,0 MiB) copied, 0,00953695 s, 110 MB/s
$ dd if=flash_dump of=mtd4 skip=31744 bs=512
1024+0 records in
1024+0 records out
524288 bytes (524 kB, 512 KiB) copied, 0,00401272 s, 131 MB/s
Now I have five splitted partitions to work with. The next section is about how to find good stuff like ... secrets!
2.3 Looking for firmware secrets
I will introduce you a very powerful tool called rizin, maybe the best open source software you can find for reverse engineering.
Note: A nice GUI for rizin is here Cutter
2.3.1 mtd0 partition
Do you remember uboot password prompt? It smells like a secret.
$ rizin mtd0 # mdt0 is the boot partition
[0x00000000]> /i passwd
Searching 6 bytes in [0x0-0x80000]
hits: 1
0x0002a9a4 hit1_0 . 0%dst input Passwd:ipc.fos~%2.
That was easy, ipc.fos~%2 is the password for the bootloader console access.
2.3.2 mtd1 partition
mtd1 partition is more complex than mtd0, so I need some help to identify known elements in the blob. binwalk is a tool designed for explore what is inside easily:
$ binwalk -e -M mtd1
DECIMAL       HEXADECIMAL     DESCRIPTION

0             0x0             uImage header, header size: 64 bytes, header CRC: 0xAF395D8A, created: 2017-11-07 02:41:11, image size: 2976536 bytes, Data Address: 0x80008000, Entry Point: 0x80008000, data CRC: 0x36BDB2E2, OS: Linux, CPU: ARM, image type: OS Kernel Image, compression type: none, image name: "Linux-3.4.35"
15124         0x3B14          xz compressed data
15356         0x3BFC          xz compressed data
Command arguments: -e is for extract and -M for recursive extracting
Link to full list of files found on mtd1
There is no special program from Foscam in mtd1, but just configuration files. Let's take a look on them:
$ find _mtd1.extracted/_3BFC.extracted/_4FD8E8.extracted/cpio-root/etc
...
_mtd1.extracted/_3BFC.extracted/_4FD8E8.extracted/cpio-root/etc/passwd-
_mtd1.extracted/_3BFC.extracted/_4FD8E8.extracted/cpio-root/etc/profile
_mtd1.extracted/_3BFC.extracted/_4FD8E8.extracted/cpio-root/etc/group
_mtd1.extracted/_3BFC.extracted/_4FD8E8.extracted/cpio-root/etc/fs-version
_mtd1.extracted/_3BFC.extracted/_4FD8E8.extracted/cpio-root/etc/mtab
_mtd1.extracted/_3BFC.extracted/_4FD8E8.extracted/cpio-root/etc/passwd
....
passwd file is empty but maybe we have luck on passwd-.
John The Ripper is an old known in this subject, so let's see
$ ./john passwd-
Loaded 1 password hash (descrypt, traditional crypt(3) [DES 128/128 AVX-16])
Press 'q' or Ctrl-C to abort, almost any other key for status
helpme           (root)
1g 0:00:00:00 100% 2/3 2.127g/s 1931p/s 1931c/s 1931C/s 123456..marley
Use the "--show" option to display all of the cracked passwords reliably
Session completed
The root password is helpme
This password is just a joke from the firmware developer. It's not there after the device booting. In early days maybe it was an easy way to access to stock cameras but now is not.
2.3.3 mtd2 partition
binwalk I choose you!
$ binwalk -e -M mtd2
DECIMAL       HEXADECIMAL     DESCRIPTION
--------------------------------------------------------------------------------
0             0x0             Squashfs filesystem, little endian, version 4.0, compression:xz, size: 11298912 bytes, 462 inodes, blocksize: 131072 bytes, created: 2017-11-16 07:51:11
Link to the full list of files found in mtd2
Wow, someone won the lottery :D. There is two interesting files here:
- _mtd2.extracted/squashfs-root/mtd/boot.sh and
- _mtd2.extracted/squashfs-root/mtd/app/bin/FirmwareUpgrade
boot.sh is a recipe to initialize the hardware, useful if you want to build your own firmware, and FirmwareUpgrade should contain the procedure to replace the current firmware in a secure way.
Foscam put a little resistance to inspection, they enveloped the firmware update file with AES-128 paper. AES-128 is symmetric-key algorithm so the key to encrypt and unencrypt should be referenced at some place in FirmwareUpgrade executable.
Let's see the strings

This is useful info, HI3518EV200 was the SDK version to build this firmware.

cd /tmp/FWUpgrade/; openssl pkeyutl -verify -in %s.hash -sigfile %s.sign -pubin -inkey /mnt/mtd/app/etc/upgrade_pub.key
That is sad, Foscam verifies the integrity with an asymmetric key, so it's virtually impossible create a custom firmware to ship it through the official update method.

dd if=%s | %s | tar zxf - -C /tmp/FWUpgrade/ clear_ko.sh clear_ko.sh.sign FWUpgradeConfig.xml FWUpgradeConfig.xml.md5 FWUpgradeConfig.xml.sign WriteFlash WriteFlash.md5 WriteFlash.sign mtd.sqfs.md5 mtd_ext.sqfs.md5 mtd.sqfs.sign mtd_ext.sqfs.sign up.k.sign up.k"
This shell command template looks like the step to unpack the encrypted firmware.
- dd if=%s: dd outputs a file to stdout
- |: pipes stdout to stdin for the next program
- %s: A black box transforms stdin data and outputs to stdout
- |: pipes stdout to stdin for the next program
- tar zxf - ...: Descompress and unpack a tar.gz from stdin
The black box is our decrypter. There should be a printf-like call to replace %s conversion specification somewhere.
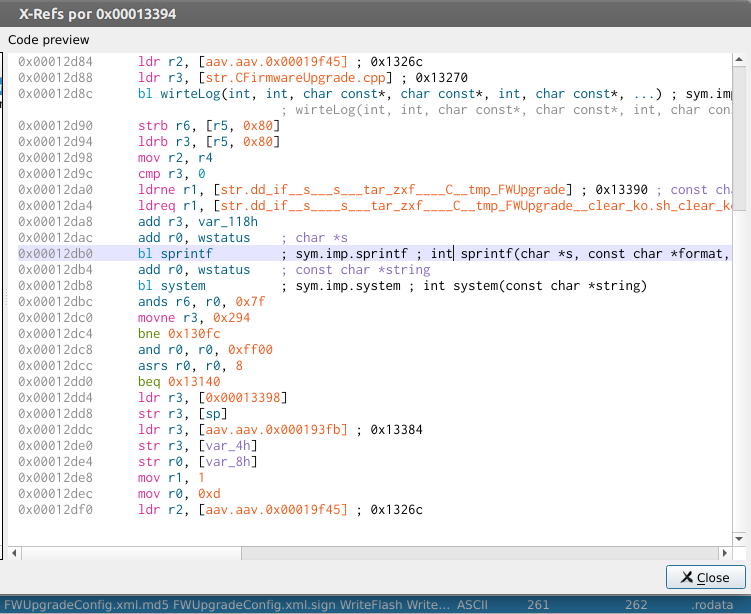
A find by X-Ref to the string literal goes right to a function with a sprintf call.
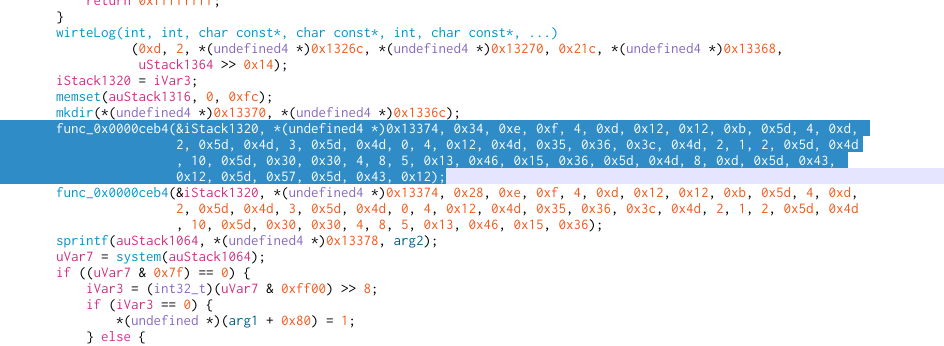
A decompile of that function to a C pseudo-code using Ghidra gives a loosy shape of how decrypter is built.
func_0x0000ceb4(buffer, "abcdefghijklmnopqrstuvwxyzABCDEFGHIJKLMNOPQRSTUVWXYZ0123456789~!@#$%^&*()_+|`-={}[]:;'<>?,./" \\", length, c1, c2, c3, c4, c5, c6 ...);
sprintf(command, "dd if=%s | %s | tar zxf - ...", package_filename, buffer);
system(command);
The black box %s is replaced by *(char )buffer later so, the result of func_0x0000ceb4 is stored there. The string literal next to buffer seems like a dictionary and length is the count of remaining arguments in the variadic function. The variadic arguments seems to be the obfuscated decrypter command string. But, what func_0x0000ceb4 is?
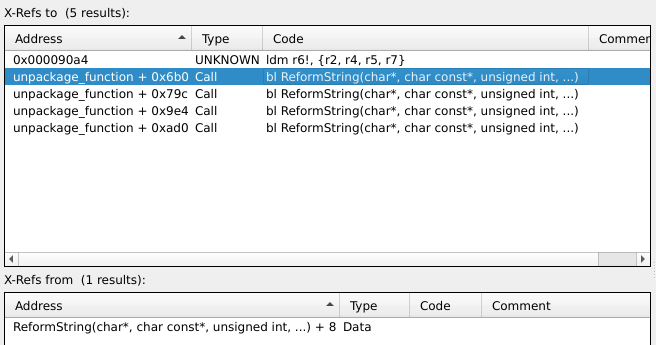
The X-Refs show that func_0x0000ceb4 is a function called ReformString, with a pending definition to be added by a shared library. Where the shared library is ?
rz-bin -l lists the executable's linked libraries
$ rz-bin -l _mtd2.extracted/squashfs-root/mtd/app/bin/FirmwareUpgrade
[Linked libraries]
libboost_serialization.so.1.48.0
libcommonLib.so
libProduct.so
libssl.so.1.0.0
libcrypto.so.1.0.0
libpthread.so.0
libstdc++.so.6
libm.so.0
libgcc_s.so.1
libc.so.0

10 libraries
The candidates for searching are: libcommonLib.so and libProduct.so
$ rizin _mtd2.extracted/squashfs-root/mtd/app/basic_lib/libcommonLib.so
[0x00006acc]> /i ReformString
Searching 12 bytes in [0x1fd54-0x1ffbc]
hits: 0
Searching 12 bytes in [0x18000-0x1fd54]
hits: 0
Searching 12 bytes in [0x0-0x1770c]
hits: 1
0x00004e58 hit1_0 .opTestWifiv_Z12ReformStringPcPKcjz_Z21Writ.
Bingo! ReformString is defined right there
Now, what options available to use libcommonLib's ReformString are?
- Understand the algorithm from the assembly to make your own implementation
- Compile a program linked against libcommonLib.so
- Dump the function assembly code from libcommonLib.so to generate assembly source code
After a fast evaluation the results are:
- It is torture.
- libcommonLib.so depends on the Hitec's libc and friends, so an SDK and runtime environment (firmware root) is needed. Too much work.
- This is the option for lazy people, me. (the right choice)
$ arm-linux-gnueabi-objdump -d libcommonLib.so |grep Reform
0000640c <_Z12ReformStringPcPKcjz@plt>:
00014100 <_Z12ReformStringPcPKcjz@@Base>:
$ arm-linux-gnueabi-objdump -d libcommonLib.so --disassemble=_Z12ReformStringPcPKcjz
00014100 <_Z12ReformStringPcPKcjz@@Base>:
   14100:	e92d000c 	push	{r2, r3}
   14104:	e3510000 	cmp	r1, #0
   14108:	13500000 	cmpne	r0, #0
   1410c:	e92d4007 	push	{r0, r1, r2, lr}
   14110:	e59dc010 	ldr	ip, [sp, #16]
   14114:	03a03001 	moveq	r3, #1
   14118:	13a03000 	movne	r3, #0
   1411c:	03a00000 	moveq	r0, #0
   14120:	0a000009 	beq	1414c <_Z12ReformStringPcPKcjz@@Base+0x4c>
   14124:	e28d2014 	add	r2, sp, #20
   14128:	e58d2004 	str	r2, [sp, #4]
   1412c:	e153000c 	cmp	r3, ip
   14130:	1492e004 	ldrne	lr, [r2], #4
   14134:	17d1e00e 	ldrbne	lr, [r1, lr]
   14138:	17c0e003 	strbne	lr, [r0, r3]
   1413c:	12833001 	addne	r3, r3, #1
   14140:	1afffff9 	bne	1412c <_Z12ReformStringPcPKcjz@@Base+0x2c>
   14144:	e3a02000 	mov	r2, #0
   14148:	e7c02003 	strb	r2, [r0, r3]
   1414c:	e28dd00c 	add	sp, sp, #12
   14150:	e49de004 	pop	{lr}		; (ldr lr, [sp], #4)
   14154:	e28dd008 	add	sp, sp, #8
   14158:	e12fff1e 	bx	lr
That assembly dump is enough to write ReformString.s
In the first try ReformString.s didn't compile because of bad instructions
ReformString.s: Assembler messages:
ReformString.s:22: Error: bad instruction `ldrbne lr,[r1,lr]'
ReformString.s:23: Error: bad instruction `strbne lr,[r0,r3]'
In this forum Tejas Belagod suggests to add .syntax unified to make the assembler able to understand the syntax.
To test that everything is ok, I copied a ReformString call from the FirmwareUpgrade disassembly as shown above in Cutter: reformStringTest.c.
Can you run this program with no special hardware beyond your computer? Yes, with QEMU
Years ago aurel32 made a small tutorial to run an ARMv5T emulated machine (versatilepb), thanks to his work, the steps to run the machine was reduced to:
wget https://people.debian.org/~aurel32/qemu/armel/debian_wheezy_armel_standard.qcow2
wget https://people.debian.org/~aurel32/qemu/armel/initrd.img-3.2.0-4-versatile
wget https://people.debian.org/~aurel32/qemu/armel/vmlinuz-3.2.0-4-versatile
qemu-system-arm -M versatilepb -kernel vmlinuz-3.2.0-4-versatile -initrd initrd.img-3.2.0-4-versatile -hda debian_wheezy_armel_standard.qcow2 -append "root=/dev/sda1"
In the VM, remember turn back the clock to 2017 to avoid GPG expired keys (wheezy is very old) and change ftp.debian.org repositories to archive.debian.org. Once it's done that, and apt-get update will have a flawless run.
root@debian-armel:~# apt-get install build-essential
root@debian-armel:~# as -march=armv5t ReformString.s -o reformString.o
root@debian-armel:~# gcc reformString.o reformStringTest.c -o test
root@debian-armel:~# ./test
openssl enc -d -aes-128-cbc -k WWeift*v2
Finally! The black box decrypter is revealed! Honestly I don't know if it's useful for decrypting an updated firmware from the official support page, but the funny journey to here was worth it. Also, always is good to have a guide to remember how to do this in new fw dumps.
